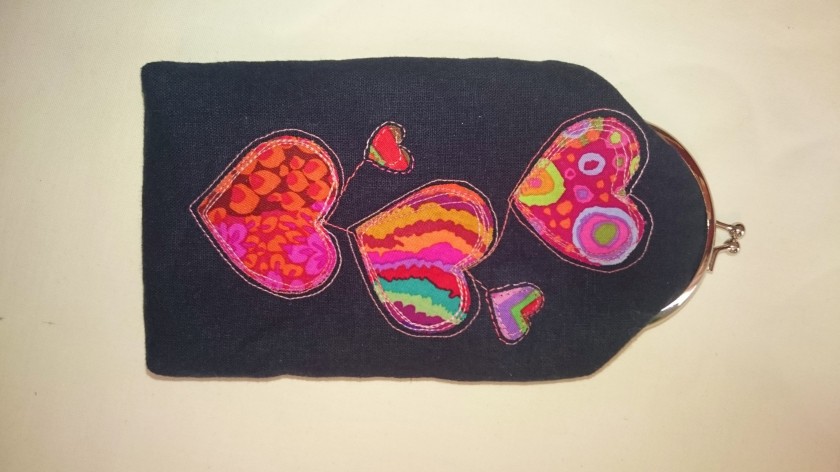
Yay, I succesfully made a sunglasses case! Along with my BFF and longterm crafting buddy, Vicky (Indigograce Designs), I manged to work out how to use a glue-in purse frame. The above item is the finished piece, which looks exactly as it should, and I have used it too. But this was not the seamless process I was dreaming of, and I am going to write about it just in case anyone else has the same beginner’s problems that Vicky and I had.
As our starting point, we decided to use an excellent free tutorial by Lisa Lam, who I consider to be Queen of bags and purses. I have her first book, which has really good instructions, and I have looked at this particular tutorial a few times before. However, I am so not good at leap-of-faith projects, and could not figure out why the top of the pattern was a different shape to the purse frame! So on went the TV, and we started to watch tutorials on Youtube, one after the other, until we finally watched one from The Makery, and the penny dropped! The shape is not important, only the length of the seam is important! If you want to actually put things in the finished purse you need to add fullness throughout the length of the item, so the curve at the top needs to be shallower to push the centre of the purse up to add the puff.
Please note, I am not ashamed of the mess on my workroom table, creativity is often messy! (Please also note my fabulous new sewing machine, the Toyota Oekaki. This was its first project.)
Pattern drafted, we moved onto the decorating part. Vicky is really good at raw-edge applique, and I am naturally scared of trying anything where I am not confident of perfection, so she agreed to mentor me through my first attempt. I chose hearts, as I wasn’t feeling very inspired, and used Bondaweb to adhere the shapes. My new machine has 10 speeds, so I turned it right down so that I could really control my stitching. I was fine! What I learned here was that the linen that I chose for the base fabric is actually pretty stretchy when you pull it around, so next time I will take the extra time to add a stabiliser before I start to stitch. You can see a tiny amount of puckering around the hearts, but luckily adding a fusible fleece got rid of it.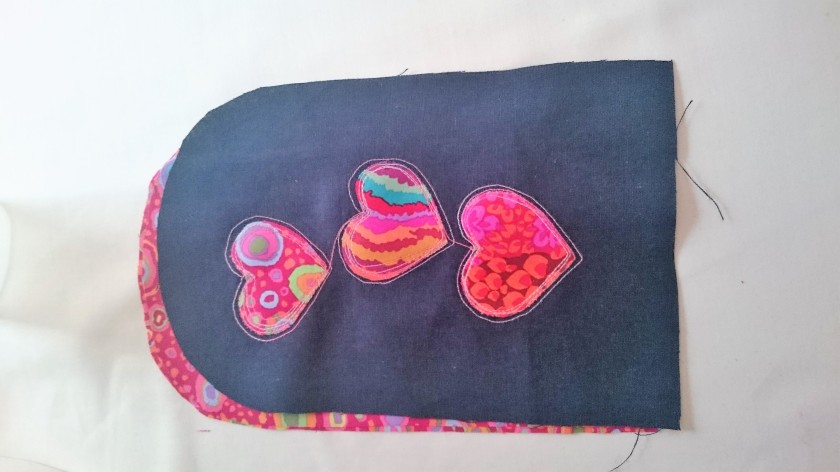
The next stage was adding the lining. This is a simple lesson learned. I always cut linings about 2mm smaller all round, to allow it to sit smoothly inside an item. This time I used a wadding which was about 5mm thick, so I should have taken off 7mm all around (not from the top though) to allow for that thickness.
Finally it was time to add the frame! Vicky and I chose to add a line of topstitching close to the top edge to make it easier to push the gluey fabric into the gluey frame. This part was much easier than I expected, although here I learned the lesson of putting on the glue with the right side facing me, so that any runs go onto the lining! Yes, I got some glue on the front, but just added some extra hearts and a little hand sewing, and I got away with it.
So, the things that I have learned about purse frames were these:
- When drafting the pattern you need to add fullness to the whole purse, not just the sides. This will change the shape at the top, but it doesn’t matter. As long as the length is the same, it will fit.
- Check the stretchiness of your base fabric before decorating it. If it is stretchy, stabilise it.
- When working out the size for your lining, remember to allow for any wadding you are using, and make it smaller by that thickness.
- When adding glue to anything, make sure you do it from the front so that you can see and prevent drips!
If anyone has any other helpful lessons, please add them in the comments.


")
")
")
")


